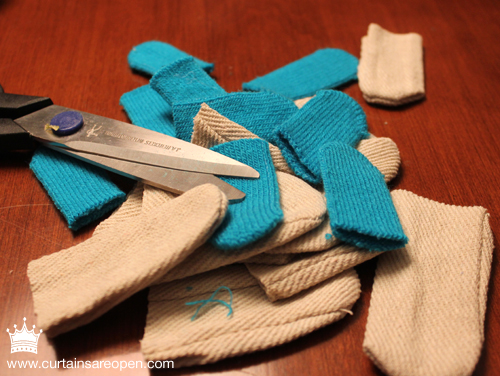
There was a time when I did A LOT of crafts…when I had a room dedicated to scrapbooking and all of the wonderful things I’d make in the run of a year. Eventually, I didn’t craft anymore…life got in the way of finding time to do things I once found so joyful.
The other day, I was in the storage room looking for something or other when I ran across the plastic tubs full of bits and pieces of long forgotten supplies, and I remembered these sweet little snowmen I’d made…then thought, “I should make those for the blog.”
After all…The Tall Blonde has spent the last year asking me if I’d like to build a snowman…and now might be the time.
So, a quick trip to Michaels and the Dollar Store…along with gathering a few things I’d already had…and I put together the supplies I needed to make ten, incredibly cheap and adorable…wee little snowmen.
All you need, a pair of canvas work gloves, a pair of stretchy mittens, a co-ordinating piece of felt, pom poms, paint (white, black, pink and orange), glue, cotton balls, paint brushes and scissors.
Step 1: Cut the Fingers off all of the gloves.
Step 2: Stuff the little snowmen bums with cotton balls…as many as you can.
Step 3: Glue along the bottom edge of the stuffed snowman form, and put a dab of glue in the middle as well.
Step 4: Plop the little guy down on top of a small piece of felt.
Step 5: Paint the glove white. This serves two purposes, it makes it snow white rather than beige canvas…and it also adds stability to the material when the paint is all dried.
At this point, I stopped for the evening to allow the glue and paint to dry. I left them overnight, but a few hours would do. Mostly, the paint dries quickly but you want to give lots of time for the glue to adhere.
Step 6: Trim the extra felt off from around the bottom of the snowman.
Step 7: Add their little hats and roll up the brims!
Step 8: Plop a dot of orange on for a nose and pull the paint out into a point to make a carrot nose. Then, using the end of your paint brush…dab it in black paint and make eyes, mouth and buttons down the front. REMEMBER, rocks (typically used for real snowman eyes and buttons) are various sizes, so don’t try to be perfect here…every snowman takes on its own personality when you try not to be perfect!
Step 9: Dip a brush in pink pain but then dab it off so there’s very little paint on your brush…then “dry brush” it onto your snowman to give him rosy cheeks.
Step ten: Take a family photo!
You’ll end up with ten adorably cute snowmen all from two pairs of gloves each costing a dollar! If you’d like, you can sew in a piece of string to hang it on the tree, or just use a hook through the hat to hang them on the tree…whatever works!
And now, I just have one questions (although if you’re a mom, you’re probably sick and tired of hearing this request)…do you want to build a snowman?


Look at you all Martha Stewart-y again!!
I LOVE these.
Totally making some with my Things!
So fun.
Great post!
I haven’t done something like this in SO long! It felt really good to do something crafty again! LOL Enjoy, easy craft with the kids and super cheap at that!
Yup! I’ll buy the supplies this weekend!
The Things are creative and love to make things. I’ll share the final product. 😀
I remember making these little guys back in the day…although felt bottoms are much nicer than sewing them like my instructions said! I had been away from crafting for quite awhile too. I have recently picked it up again to keep me occupied while waiting for my oldest to get home with the car…need the distraction to keep from worrying so much. It’s quite therapeutic. Reminds me of the old days! 😉
I can’t craft without thinking of you! xo